Are you wondering how to install and set up Yoast SEO for your WordPress site correctly?
Congratulations! You have come to the right place.
Anyone who starts looking for useful WordPress plugins will eventually come across this plugin – and rightfully so. Installing Yoast SEO is definitely the right step to optimize your website’s SEO endeavors.
It’s the most comprehensive SEO plugin for WordPress on the market right now and can do lots of things a professional SEO specialist could wish for.
And on top of all, the basic version is completely free.
If you order our service, we will install and configure the Yoast SEO plugin for you in just 2 working days, guaranteed!
If you, however, choose to do it on your own, feel free to read along and we will show you how to install the Yoast SEO plugin the right way.
What Exactly Is the Yoast SEO Plugin?
But first things first.
To make sure we’re all on the same page, let’s get a quick definition of the Yoast SEO plugin down and show its main features:
As already mentioned above, the Yoast SEO plugin is one of the most useful SEO-related WordPress plugin out there. More than one million websites have installed this plugin and is the perfect tool to …
… get more traffic to your website
… increase your click-through-rate from Google search result pages, and
… optimize and target your website’s content even better.
Page Analysis/Write better content
The plugin analyzes your posts and reminds you of the little things you might forget that are important for SEO-optimized content. For example, it checks if …
… your posts are long enough,
… they contain images,
… those images have alt descriptions,
… you have written a meta description,
… you used your focus keyword,
… and much more.
Technical Search Engine Optimization
The plugin gives you options to tweak some technical SEO aspects, such as making improvements to permalinks, meta tags and link elements.
XML Sitemaps
XML Sitemaps are basically a roadmap you give to search engines for them to use as they crawl your site. Yoast SEO will generate these for you and keep them up to date automatically.
Social Integration
If you have profiles on social media, Yoast SEO makes sure search engines know that these profiles are associated with your website. It also gives you options to customize how your content looks like when it’s being shared on those websites.
And many more …
How To Set Up Yoast SEO
4 Easy Steps
Okay, now that we’re all on the same page, let’s get started.
In step 1, we will show you how to install Yoast on WordPress.
Step 2 will cover the basics in the General settings.
Step 3 will be the heart of Yoast SEO’s settings – the Search Appearance.
And last but not least, step 4 will cover the Social settings of the plugin.
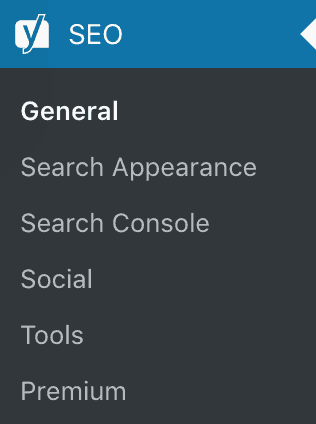
You’ll notice that we didn’t include the menu items Search Console, Tools and Premium. That because these items don’t actually contain configurations per se, so you won’t find them in this blog post. However, make sure to browse through these as well, as they contain some handy tools and show you the features of the premium version – but for most users, the free version should provide plenty enough features.
Alright, let’s get started.
Quicklinks:
Step 1: Find and Install the Yoast SEO Plugin
On your WordPress backend, navigate to Plugins → Add New and search for “Yoast SEO”. It should be the first plugin that pops up – install and activate it.
It’s as easy as that.
Now that you’ve got the plugin installed, it’s time to tweak some settings. In the following steps we will show you how to configure the Yoast SEO plugin correctly.
Please keep in mind: Setting up Yoast SEO is rather tedious and repetitive. There are many small tweaks and settings to configure – so bear with us and don’t expect a thrilling read.
It’s important to note that the following steps are our basic recommended way of configuring Yoast SEO. Each website is different, and you might want change a couple of settings here and there to better suit your website.
Remember to always click on “Save changes” when making adjustment within the plugin settings.
![]()
Step 2: General
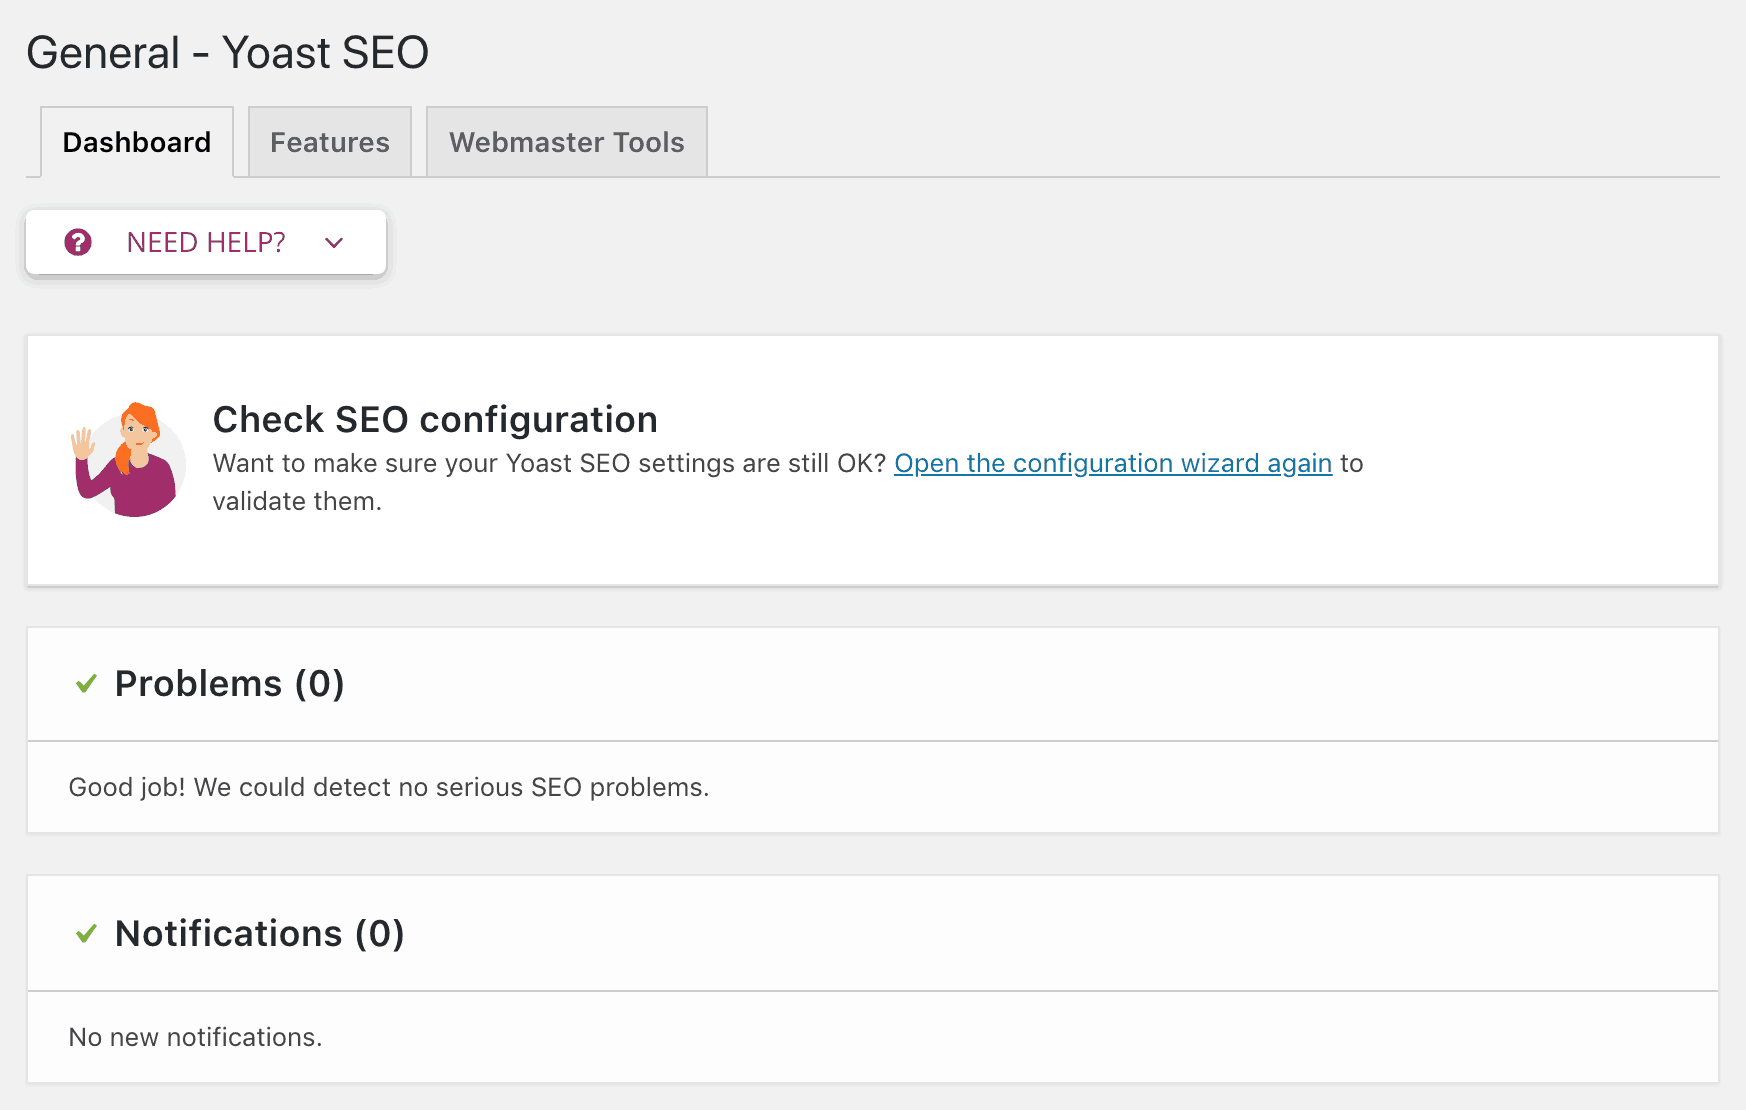
Using the left hand menu of your WordPress backend, navigate to Yoast SEO → General.
On the first page that shows up, you will see an overview of any problems or notifications that the plugin might have found. If anything pops up here, you should definitely investigate. But first let’s dive into the settings.
On the second tab – Features – you can adjust which features of Yoast you would like to enable or disable. We recommend to set everything to “Enabled” for now, however, in our case we disabled the Ryte integration since we don’t use that.
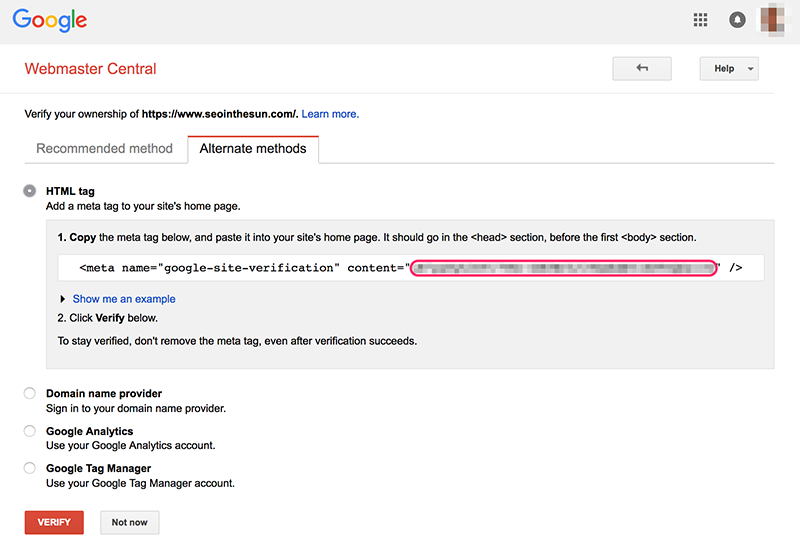
The third tab – Webmaster tools – is used to verify different webmaster tools, such as Google Search Console. If you haven’t verified Google Search Console through a different method already, we highly recommend to do so here. Simply copy the relevant meta value from Google Search Console to the appropriate box (the meta value can be found by going to Manage Property → Verify This Site in Google Search Console and then choosing the HTML tag method, highlighted in the image above).
Okay, so far so good. Moving on to Search Appearance.
Step 3: Search Appearance
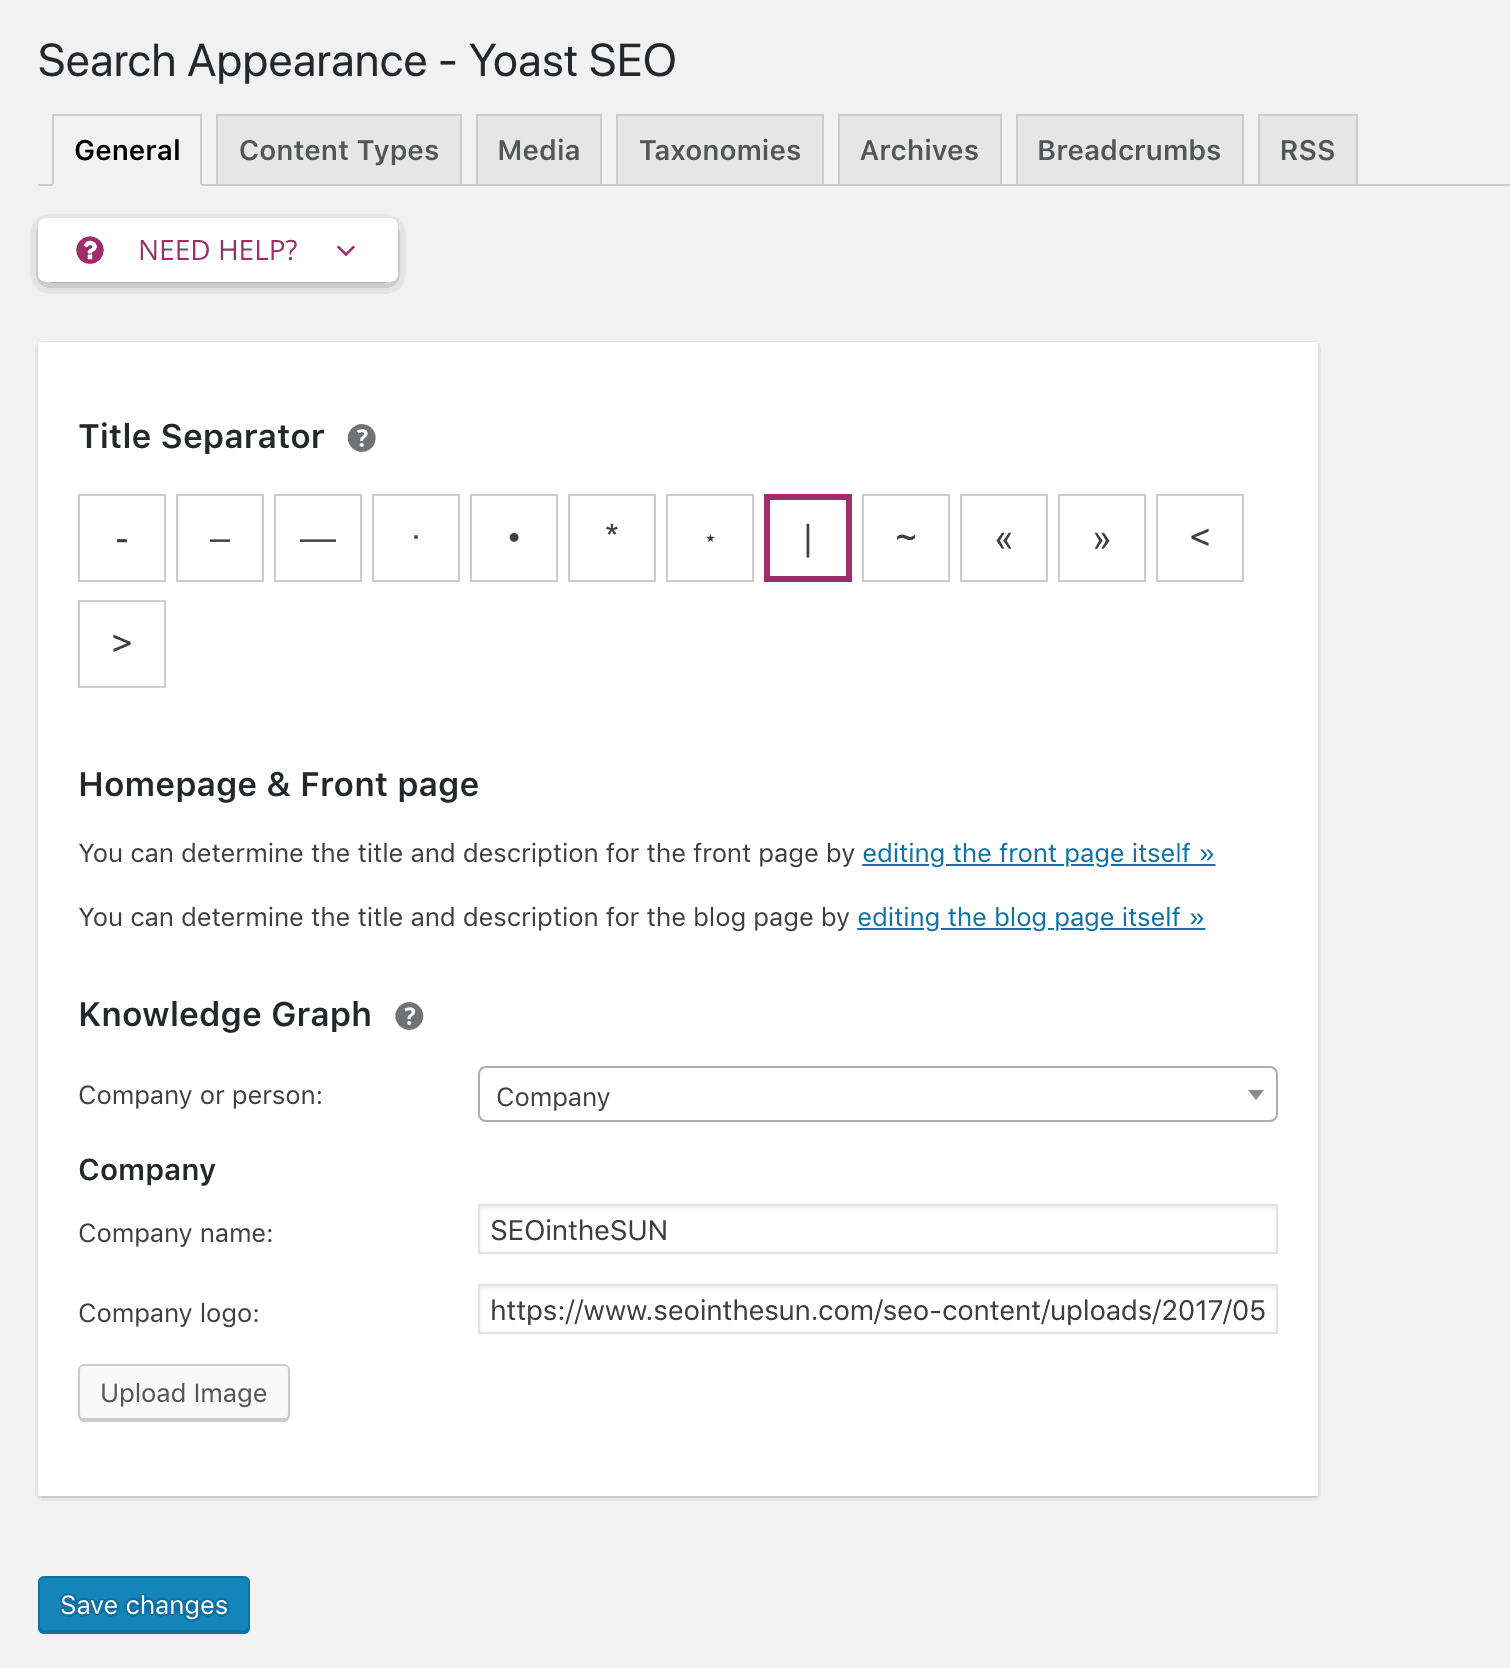
Again, using the left hand menu, navigate to Yoast SEO → Search Appearance.
On the General tab, you can choose one of the displayed Title Separators. This is more or less a matter of personal choice. For best readability we recommend to go either for a dash [ – ], a bullet [ • ], or a vertical bar [ | ]. Also keep in mind that the narrower your separator is, the more space you will get for your meta titles in Google’s SERPs (search engine results page) – even if it’s just a couple of pixels.
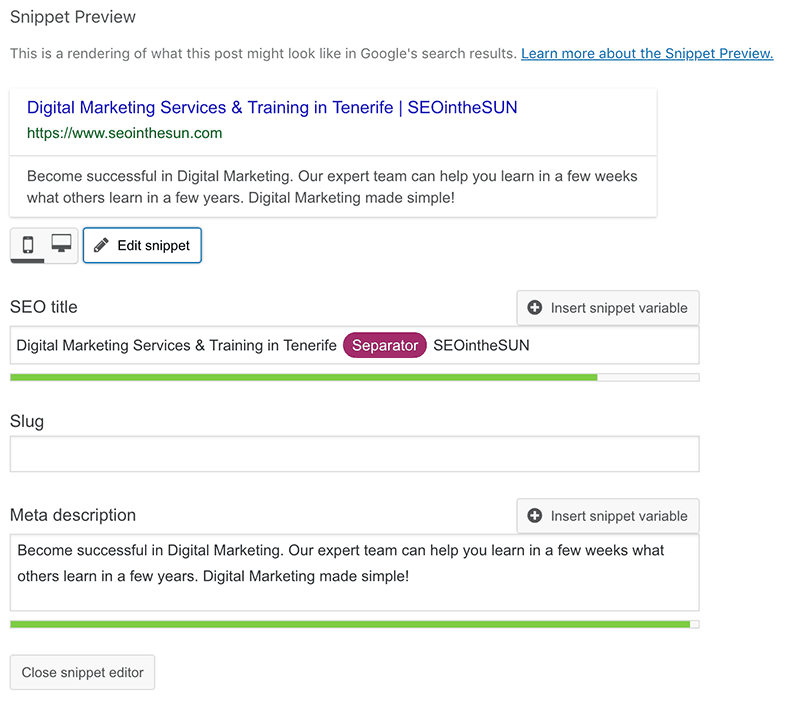
If you haven’t already set a Meta Title and Description for your front page (or blog page, if you have one), you can do so right here. Simply click on the corresponding link(s). On the following site, scroll down to the snippet editor where you can alter the meta title and description.
Lastly, on the very bottom of the general tab under Knowledge Graph, configure whether you’re a company or a person and enter your name here. This information will help your website’s indexation in Google’s Knowledge Graph.
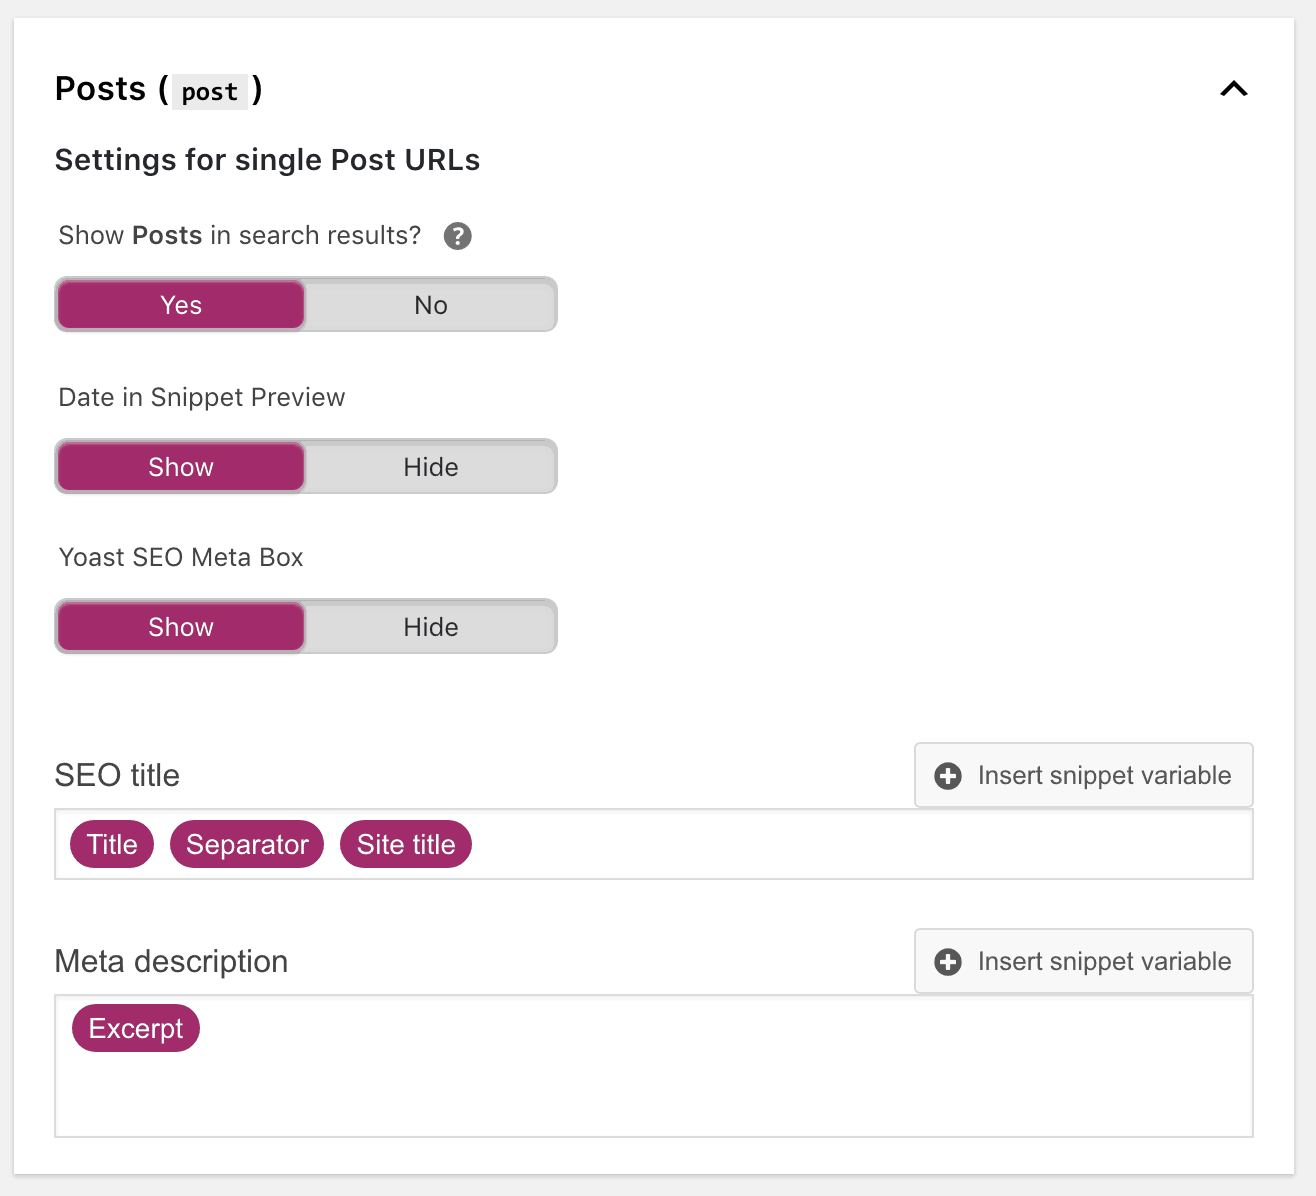
On the Content Types tab, you can choose for each content type …
- whether or not this type should appear in search results,
- whether or not to show a date in the snippet and
- whether or not shot the Yoast SEO Meta Box below this content type, which lets you modify the meta titles and description of each piece of content manually.
Which settings you apply here depends on your website and it’s purpose or goals. Most likely you would want your pages and posts to appear in search results, and therefore also have the Yoast SEO Meta Box displayed.
Below these settings, you can configure a basic template for meta titles and descriptions of posts and pages (and any other content types you might have). These will be used if you don’t manually enter meta titles and tags for your content (which you should).
There are several variables you can use here, which all are listed and explained under Need Help at the top of the page. For now, we recommend to go with [Title] [Separator] [Site title] for the SEO title and [Excerpt] for the meta description template – but feel free to alter this to your liking.
The Media tab only contains one single setting which lets you decide whether or not redirect attachment URLs (which WordPress automatically generates whenever you upload media) back to the original media file. We recommend to leave this setting set to “Yes”.
If your website uses categories and tags to organize your content, you can alter the meta title and description templates of those on the Taxonomies tab, just like you did with the content types.
On the Archives tab, we recommend to disable both Author and Date archives to prevent duplicate content. If you leave this enabled, it might pose a problem to your ranking in the SERPs (search engine result pages), as the search engines won’t know which URL of the pages with similar/same content to display. For more information on this, check out this article by Yoast regarding duplicate content.
On the second but last tab Breadcrumbs, you can choose to enable breadcrumbs for your site. We recommend to disable the breadcrumbs functionality for now, as it requires a little more reading and some coding to implement them on your website. However, if you want this functionality, check out this article by Yoast regarding implementation of breadcrumbs.
And finally, on the RSS tab, you can add information regarding your website in the RSS feed, which is highly recommended. There will always be scapers out there who will steal content and copy blog posts word-for-word. You can hardly prevent that. But by adding links to your website and blog posts in the RSS feed, you at least will get attribution and search engines will know where the content originally came from.
Therefore, we recommend to put something like %%BLOGLINK%% before each post, and The post %%POSTLINK%% appeared first on %%BLOGLINK%%, %%AUTHORLINK%%. after each post in the RSS feed. The different variables are explained below these settings in the Yoast plugin.
Moving on to the Search Console.
Step 4: Social
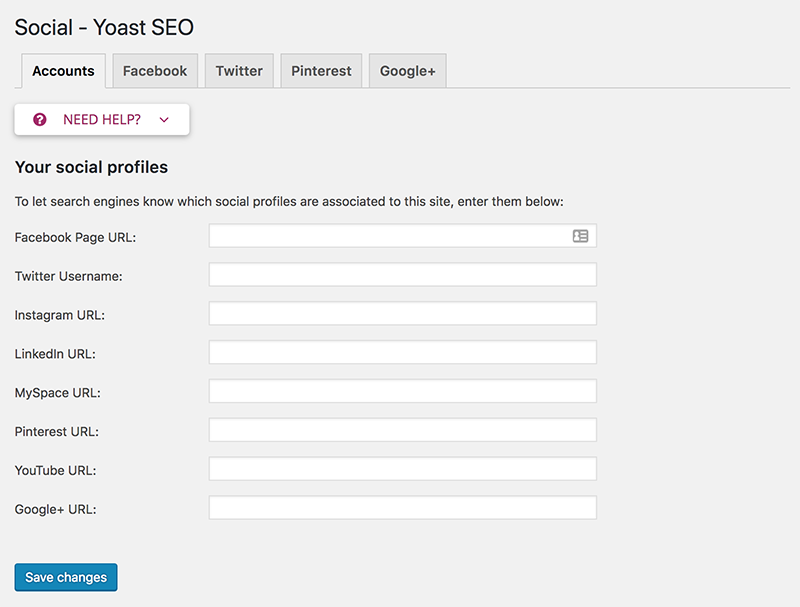
Navigate to Yoast SEO → Social.
This step really depends on whether or not you use any of the listed social accounts for your website. It’s pretty self-explanatory – if you have any social accounts like Facebook or Twitter, you can add them here to let search engines know that these profiles are associated with your website.
Similarly, on the tabs here (Facebook, Twitter, Pinterest and Google+) you can further customize how your content is displayed if it’s shared on those social websites.
Conclusion: A Lot of Functionality… and Confusion?
And that’s it! If you have made it this far, congratulations!
We talked you through the necessary steps and showed you how to set up Yoast SEO for your WordPress website.
As you could see, Yoast SEO adds a ton of functionality to your WordPress site. And for new webmasters maybe even quite a bit of confusion.
On top of that, if configured wrongly, the plugin might underperform or even harm your SEO endeavors.
So if you still feel like you are not up to the task, or if you simply do not have the time to install and set up the plugin on your own, have a look at our Yoast SEO Setup Service page. We are more than happy to install and configure the plugin for you – in just two working days, tops!
Yoast SEO Setup
Yoast is the #1 SEO plugin for WordPress websites. But you can only use its full potential when it’s configured in the right way.
Save some time and let us do that. We’ll set it up and make sure to choose the correct settings for your site.

